Create a form
Minform makes it easy to create beautiful and functional forms with either ai chat mode or doc like editor. Use whichever flow fits your brain: tell the AI what you want, or build it yourself with slash commands.
1. Start a new form
Signup for a free account. After login, a default space will be automatically created for you. From there, you can either chat with AI or create with using slash (/) command.
A. Chat with AI
- Type something in natural language to describe what type of form you wanna build or ask AI for more inspiration. Example:
Create a gym membership form with name, phone, membership plan, and discount for annual.
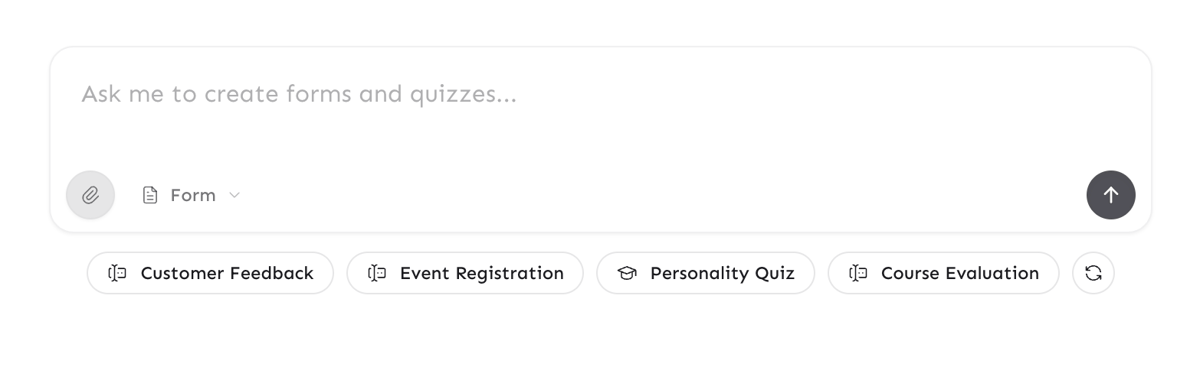
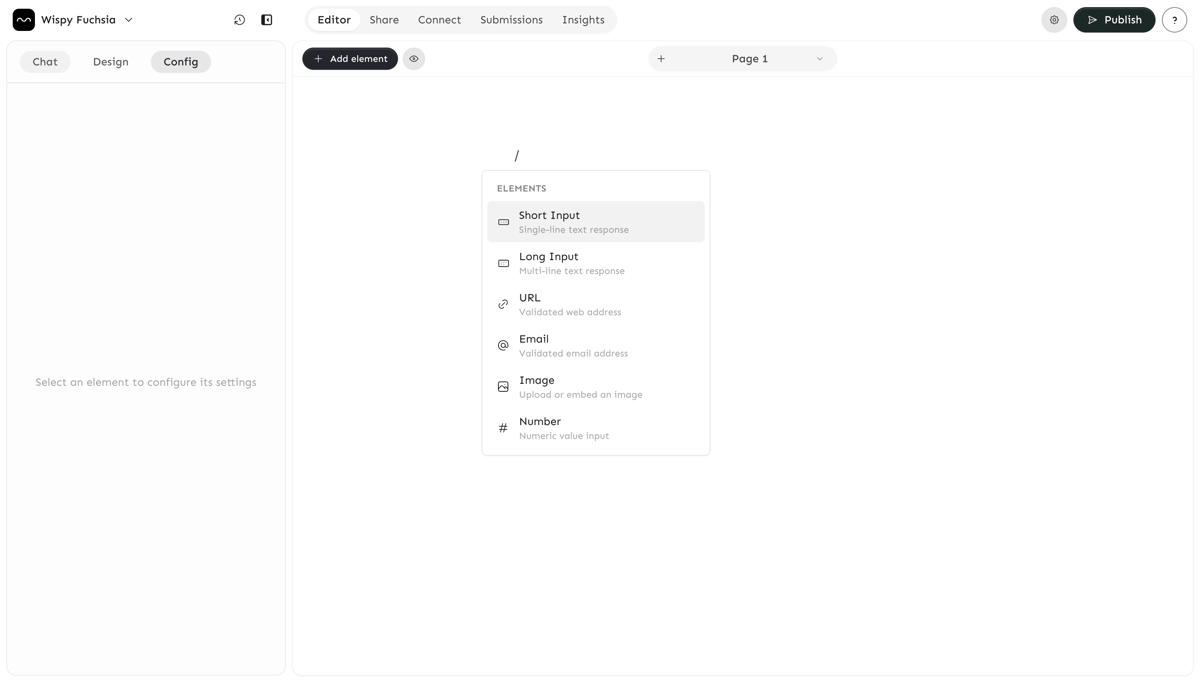
B. Create with doc interface
- Click on
New Formbutton to create a new blank form which will redirect to editor. From there you can either use (/) slash command to add fields or ask AI to build a form for you.
You can even modify existing form via chatting. Some examples:
- Add new dropdown element below the description field.
- Remove the second page
- Add a new page including address information.
- Modify the ending page to make it more informative.
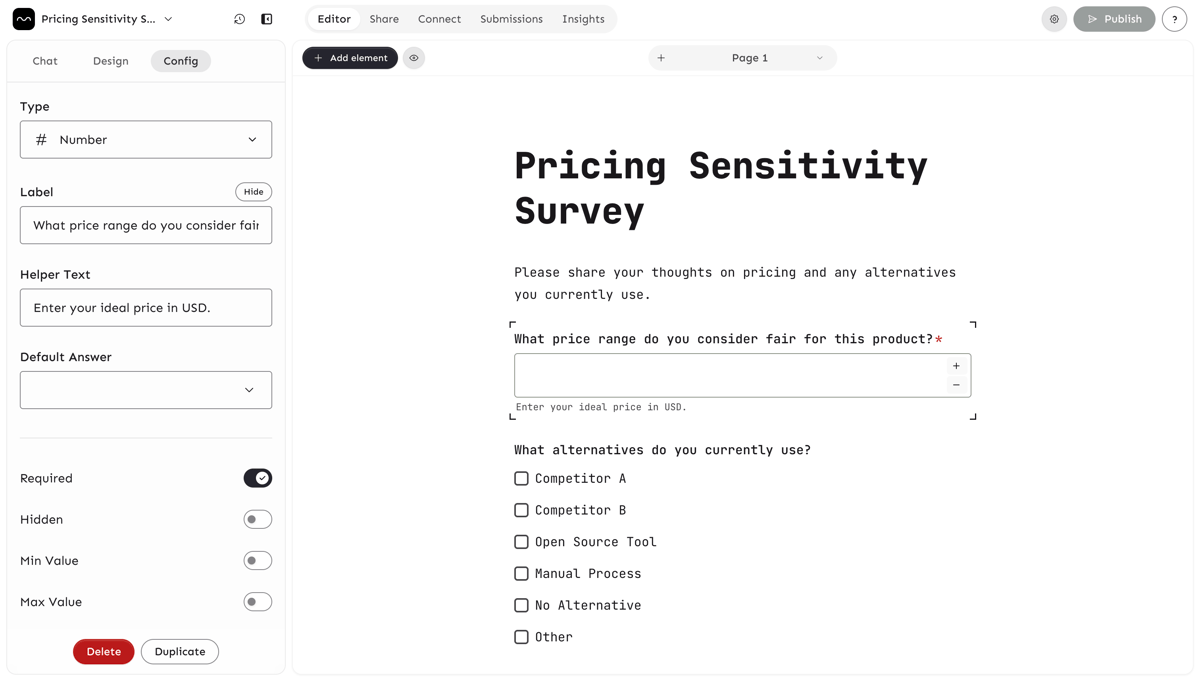
2. Customize the field settings
Click on any field to open its settings panel. Here, you can adjust the label, placeholder, required status, and more. You can also set default values and configure hidden option toggle to create dynamic forms based on conditional visibility (more on this in next section).
3. Customize the design
Make your form visually appealing with the built-in theme customization options. You can
- change the colors and choose from a growing list of pre-built schemes.
- choose from a list of 1000+ google fonts
- change input mode (label-outside mode)
- let editor pick any random theme via
randomizebutton - customize the button (size, alignment, shape).
The editor preview your all your changes in realtime.
4. Edit form settings
Quickly adjust how your form works and looks under Form Settings:
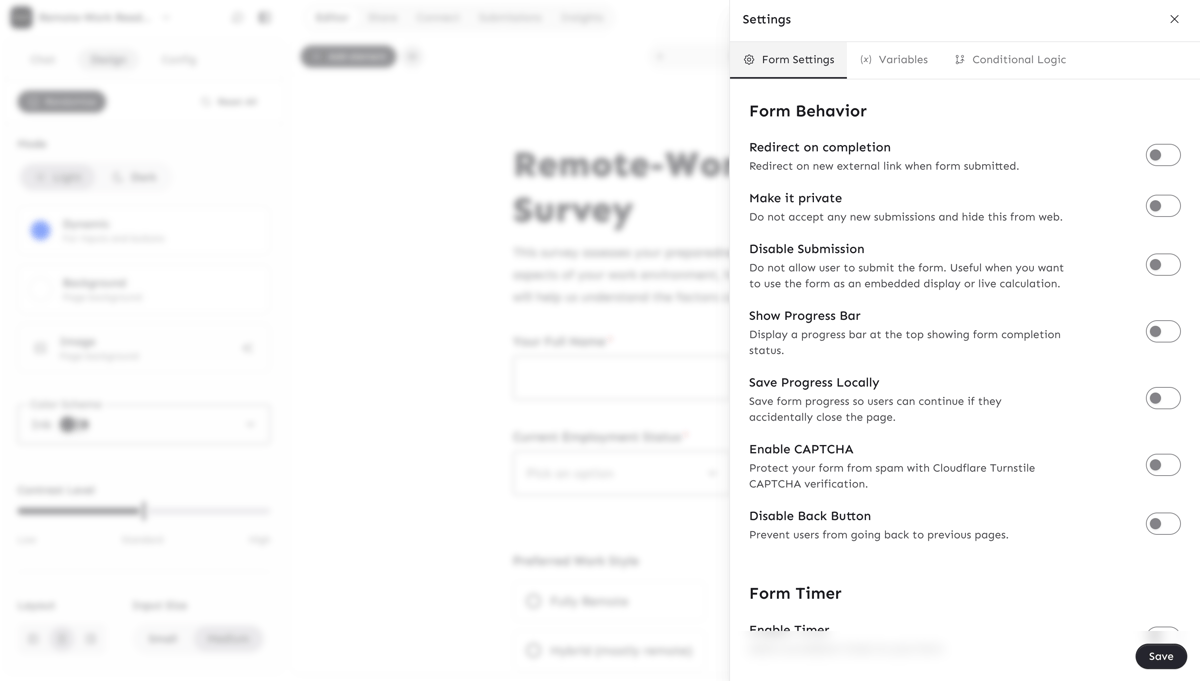
- Redirect – Send users to a custom link after submit.
- Private mode – Hide the form and stop new submissions.
- Disable submit – Use the form as a read-only or calculator view.
- Progress bar – Show users how far they’ve gone.
- Save progress – Keep answers locally if they leave.
- CAPTCHA – Add Cloudflare Turnstile for spam protection.
- Button text – Change labels for Back, Next, Submit, Start.
- Timer – Add a countdown for urgency or quizzes.
5. Publish and share your form
Once your form is ready, click Publish button at the top-right of the toolbar and you’ll be presented with a share box to share with url directly. You can also embed the form in your website using multiple embed options
6. Use advanced features
Do more with minform using advanced logic and calculators, creating thank you pages, multiple columns and pages. Checkout these templates for advanced customisation
- Test your digital marketing IQ Quiz
- Adsense calculator
- Gym registration form
- What’s your Archetype Quiz
- Compound interest calculator
and many more you can find here