Collect Payments on Your Forms with Stripe
Minform lets you accept payments directly on any form using Stripe. Add a payment field, connect your account, set your price - and you're live. You can set it up manually in the editor or let AI build the entire checkout form for you.
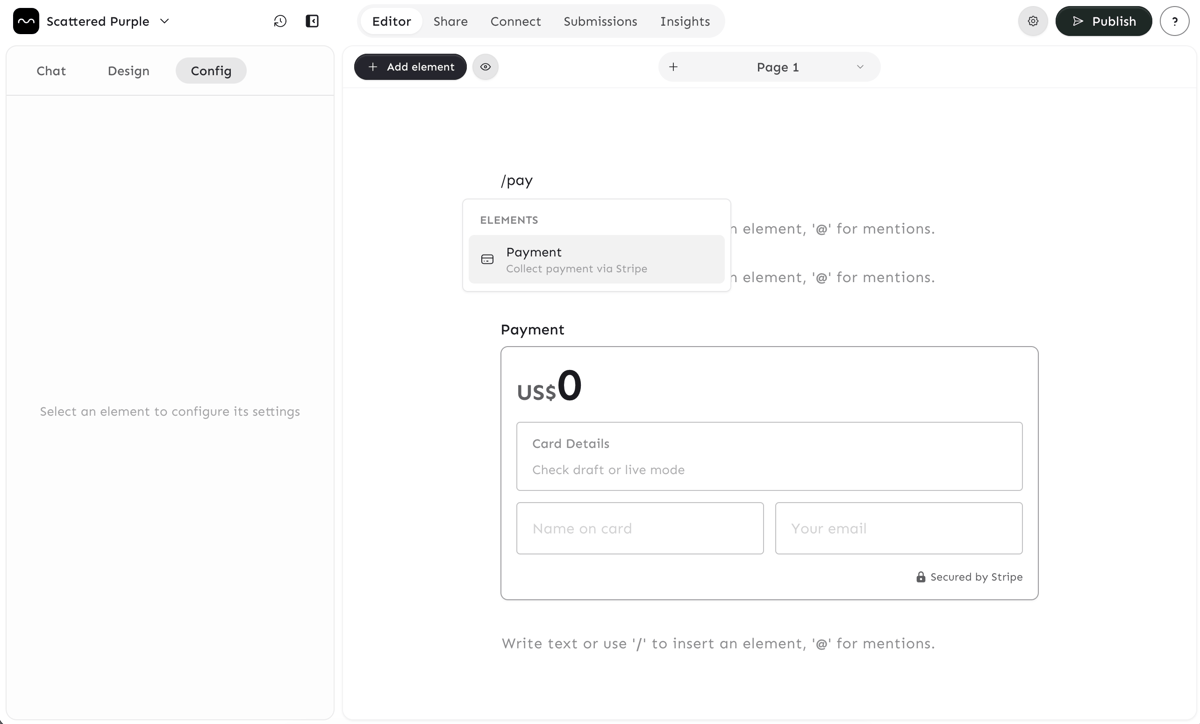
1. Add a Payment element
Open your form in the editor and type /payment or drag the Payment element from the sidebar. This adds a secure Stripe-powered card input to your form.
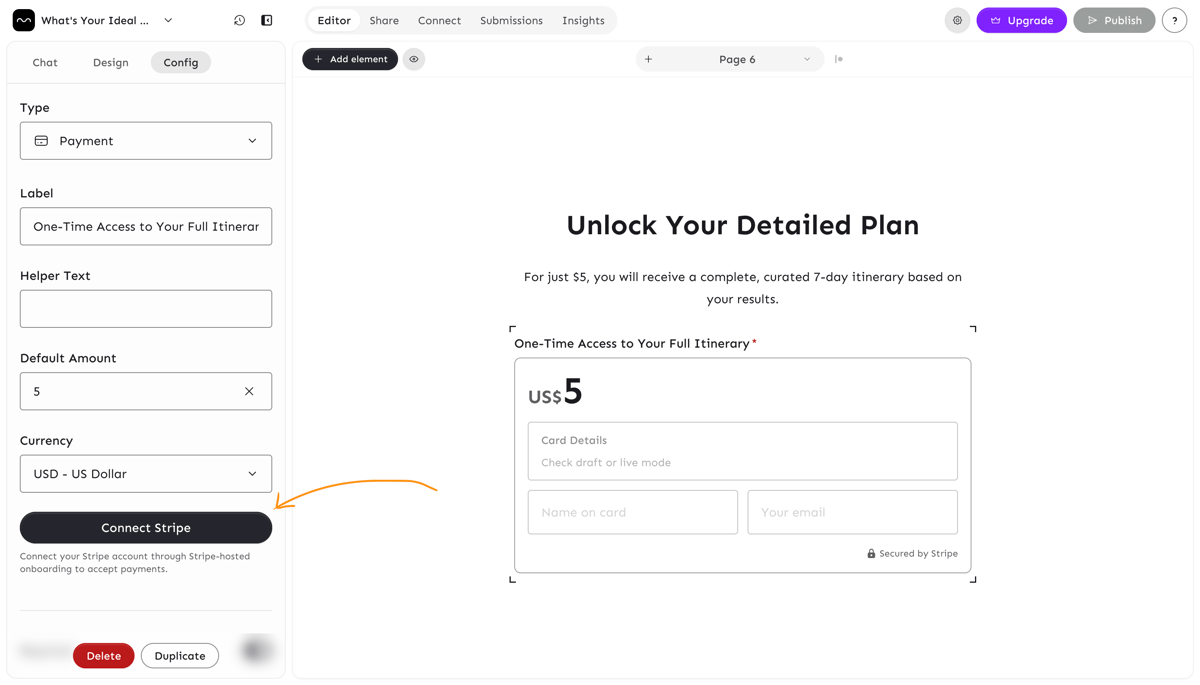
2. Connect your Stripe account
In the Payment element settings panel, click Connect Stripe. You'll be redirected to Stripe to complete onboarding — just follow their steps.
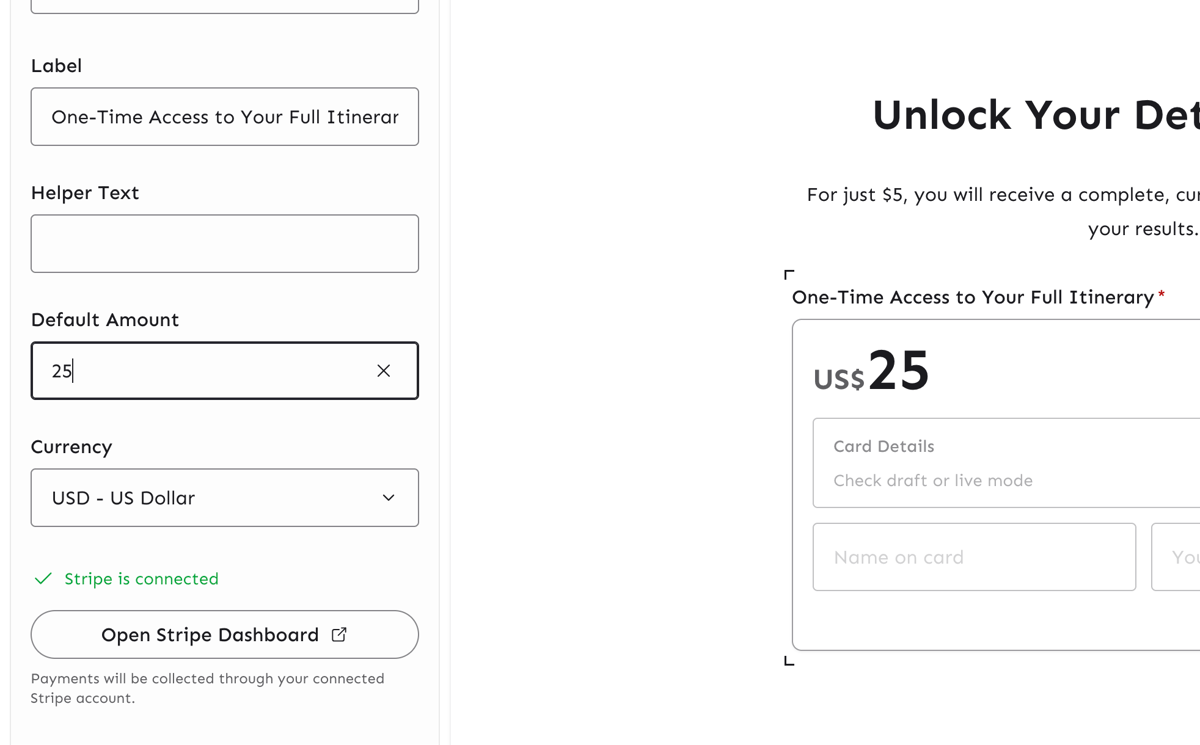
Once done, you'll see a green Stripe is connected checkmark back in the settings panel.
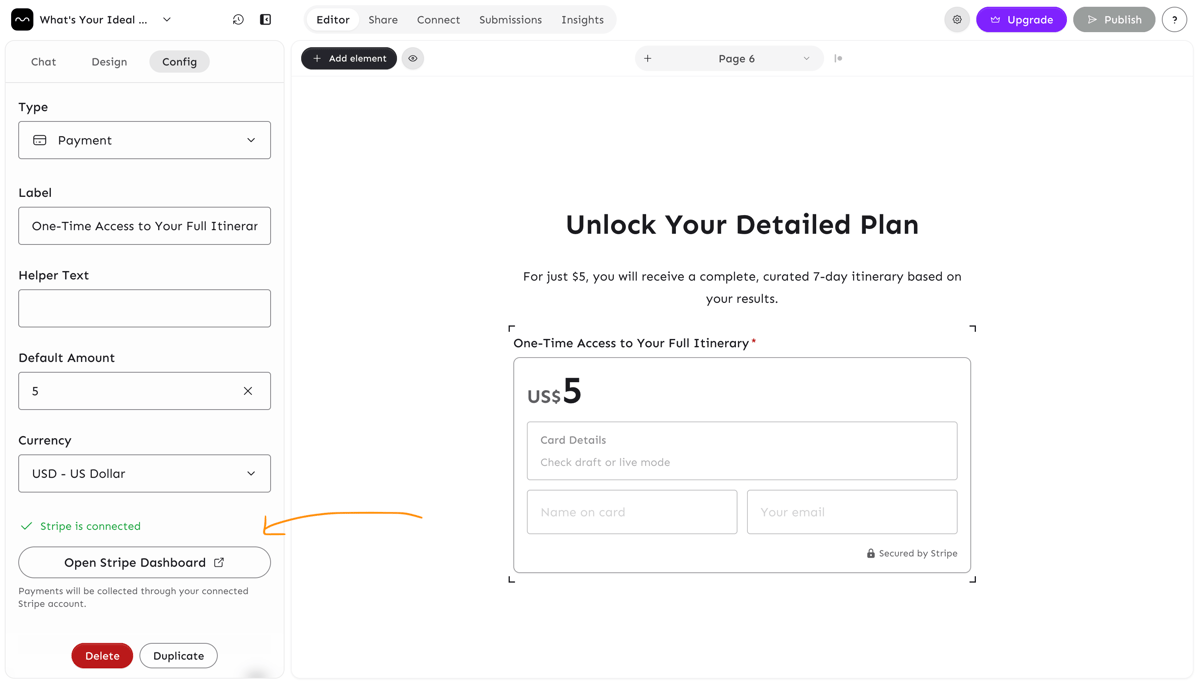
If you close Stripe onboarding before finishing, click Continue onboarding to resume.
3. Set amount and currency
Enter a fixed amount in the Default Amount field and pick your currency from the dropdown. 38+ currencies supported including USD, EUR, GBP, INR, and more.
4. Let AI build it for you
Don't want to set it up manually? Describe what you're collecting payment for in the AI chat — Minform will generate your form with a payment page already wired up.
Create a workshop registration form that collects name, email, and session preference. Charge $49 on a payment page before the thank you page.
Works great for paid quizzes, certifications, or gated results.
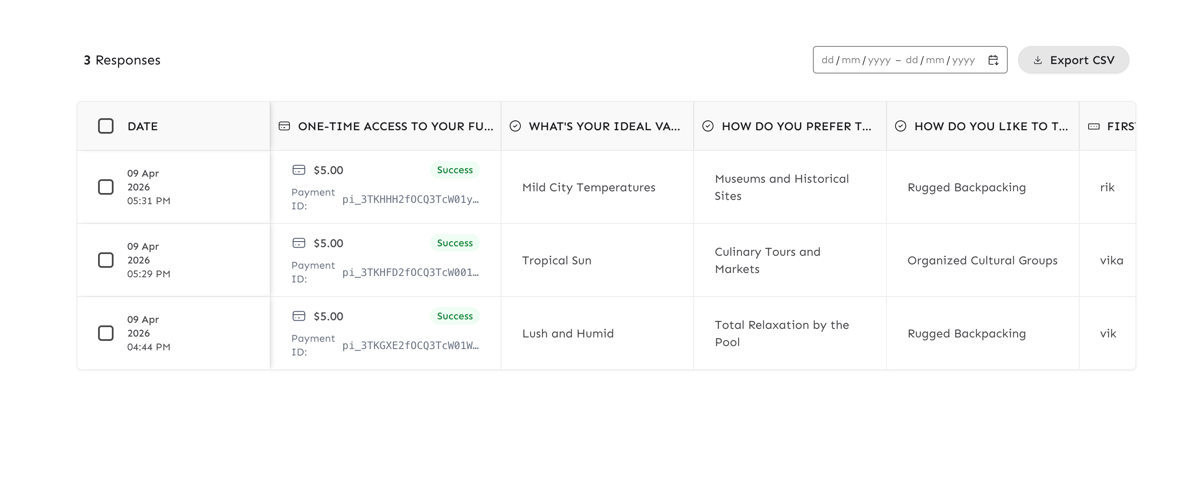
5. View payments
Every submission shows the payment amount, status, and Stripe ID in your Results table. Green means succeeded, amber means pending, red means failed. You can access your full Stripe Dashboard anytime from the payment element settings.